The cursor will turn into the tool you select.
(Note: The last two tools only appear when you have selected an area
of the image to be edited.)
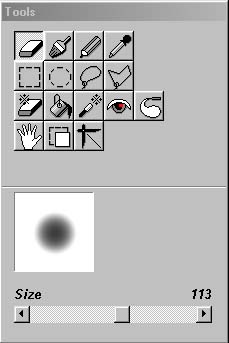
When you click on one of the following tools: Eraser, Brush, Pencil, Pipette, Fill or Red Eye, a spot will appear at the lower left of the menu. Click on the spot to call up a color palette. Once you've chosen a color, the slider below lets you adjust the size of the tool you're using. The spot reflects this change in size. This determines how wide an area will be changed when you select the tool, point to your image and hold down the left mouse button while dragging the mouse.
If you want to reverse the last few steps, click ![]() Undo.
Undo.
If you want to reset all changes, click ![]() Reset.
Reset.
If you like what you have done, click ![]() OK
to make the changes permanent. After clicking OK, you cannot use
Reset
or Undo anymore.
OK
to make the changes permanent. After clicking OK, you cannot use
Reset
or Undo anymore.
Drawing tools:
You use each tool by selecting it, pointing to the image area you want
to work on and dragging the mouse while holding down the left mouse button.
Brush and Pencil û When painting with a Brush, the edges will not be clearly defined and will instead be a little bit ragged. The Pencil instead has clearly defined borders.
Eraser û This is a real cool tool. The area you remove becomes transparent. Use this to cut out part of an image, e.g. a person, a face, an object, and paste it into another picture. You can reverse your erasure by holding down the right mouse button and dragging the mouse over your mistake.
Magic Eraser - Even cooler than the regular eraser. This tool erases all pixels of the same color or hue. Just use the regular eraser and the right mouse button to reverse any magic eraser actions. Or click Undo.
Pipette û Use this tool to paint with a color already in the image. With more than 64,000 colors in an image, it can become impossible to select the right one from a color palette. If you want to use an exact color from the image to paint with, select the pipette and click on the color to acquire it. The color indicator will show the color you selected.
TIP: If there are elements in your picture you don't like, e.g. the stupid lamppost in front of the setting sun, select the area and use the pipette to pick up the color from right beside the element you want to remove. Now just brush or paint over the area.
TIP: You want to find out the RGB (Red-Green-Blue) value of a specific color in your picture, e.g. a scan of your company logo. Use the pipette to acquire the color, click on the color indicator to bring up the color selection window from Windows and click on "Define Colors". You will see the color you selected in the lower window to the left and the RGB values on the right. Be careful with the results though. If you use an image that was created using a digital camera or scanner, the colors will not be correct until you've calibrated the device.
Red eyes - This tool removes red-eye effect from the image. The slider situated under the list of filters allows you to change the radius of transformation, so that you can adjust the filter to fit the red eyes. First, double-click on the filter. The mouse cursor changes to an arrow symbol. Now click on one eye. If the resulting color change overlaps the eye itself, click on Undo and change the size of the filter by moving the slider. Repeat the operation for the other eye.
Selection Tools:
Rectangle selection, Ellipse selection, Lasso,
Polygonal
lasso, Magic lasso.
Use these tools to select a specific area in your image. Once the area
is selected, all other functions, e.g. erase, paint and cut, will only
work in this specific area.
To use one of these tools, point to where you want the selection to
begin, hold down the left mouse button and drag the mouse.
Rectangle selects a rectangle. You start in one corner and end in the opposite.
Ellipse selects a circle or an ellipse.
Lasso selects the area you move the mouse around. Point to where you want to start and drag the mouse holding down the left mouse button. A red trail will show you what you've selected so far. When you release the left mouse button, the area you selected will be closed by connecting the start and end point in a direct line. So if you want to select a whole area by hand, make sure your end touches your starting point.
Polygonal lasso selects an area defined by straight lines. Left click once to set the starting point. Move the mouse to the first turning point and click again. This creates a straight line between the two points. Continue selecting corners. To finish, you need to click again on your starting point.
Magic lasso selects an area of all pixels of the same color or hue.
Copy selection copies the selected area of the image. Select
an area first, then click on the Copy selection icon and drag&drop
the copied part of the image.
Other Tools:
Fill û Fills the area you selected with the color shown in the
color indicator.
TIP: Mark an area in your image and flood it with a color to have a solid-colored background for text. This makes text more legible than on a multi-colored background.
Cut - This tool will erase everything but the selected area.
TIP: Sometimes it is very difficult to limit the function of a tool, especially when hand-painting or erasing. This is sometimes easier if you first select the area you want to paint or erase, using one of the selection tools.
TIP: Creating objects - Photo objects can be used like clip-art, consisting of small images of things, persons or parts of both that you can paste to another image. Let's say you forgot the birthday cake on the table when you took the party shot, but you have a separete photo of the cake. Open the cake photo and carefully cut out the cake. Either erase all background step by step with the magic eraser or select the cake and press Cut.
TIP: The more solid your background is, the easier it is to cut out objects. You have to make sure that background and object contrast well and that the background color shades are not touching the same shades in the object you want to cut out, i.e. don't try a blue shirt in front of a blue backround or you will "lose" it. Professionals call this the "blue box effect" since blue is a very good background color for TV image editing.